

Fitting Your SnoreMD
Get the best results with a proper fit.
First, mold the device to your teeth. Then, adjust
the jaw advancement to find your ideal setting for
comfort and snoring relief.
Molding SnoreMD
SnoreMD uses a quick boil-and-bite process to create a custom fit, unlike ready-to-wear mouthguards that often slip or cause irritation.
;'/%3e%3cpath%20d='M152.1940821128,83.7606024329c-.0007905033-1.7831715325-1.4668186082-3.2254445411-3.2499903159-3.2254445356l-105.8881835938,.0000003321c-1.783121942,.0000000056-3.249193861,1.4421483644-3.2499893489,3.2252701289-.0120422434,26.9932282361,16.7397542741,41.8733643913,26.8559539071,48.398128651,3.3754898078,2.1771293624,5.4489908392,5.8857295995,5.4489778013,9.9024227298l-.0000001698,.0523015108c-.0000058262,1.7949237305,1.4550657203,3.25,3.2499894508,3.25h41.2783203125c1.794922555,0,3.2499920233-1.455077445,3.2499821836-3.2499999999l-.0000002691-.0490902746c-.0000220324-4.0190725661,2.0778350949-7.7283208939,5.4553292111-9.9067326518,10.0985356959-6.5133404058,26.8615817205-21.3936177248,26.8496108309-48.3968558908Zm-46.21733297,46.1290574809h-19.9534982856c-8.6812153102,0-17.0833477953-3.1880266711-23.4836920729-9.0531006169-6.4167476847-5.8801055115-13.0828142219-14.7869585347-15.3893559771-27.4625469357-.6009616013-3.3025814016,1.9724043294-6.3388537367,5.3292181104-6.3388537367h87.0411038779c3.3568421198,0,5.9302329532,3.0362982891,5.3292627191,6.338906924-2.3065507242,12.6755601294-8.972607589,21.5823964613-15.3893462987,27.4624937484-6.4003442776,5.8650739458-14.8024767628,9.0531006169-23.4836920729,9.0531006169Z'%20style='fill:%20%23fff;'/%3e%3cpath%20d='M95.7758789062,74.3781738281c4.0594524674-4.3644291898,4.3769976199-8.2068012312-1.2486970247-11.0283031619-3.6185165476-1.8059835243-6.9876204432-5.5979553442-6.5959767369-10.0742777112,.4016059736-4.2769454098,4.0000756767-7.1754335842,7.8112502825-7.6859835711,.3281012135-.0461523526,.631812151,.182607413,.6777105885,.5109765537,.0268260248,.1912327003-.0387019938,.3705829699-.1625982405,.50146507-1.0717767595,1.223144305-1.9804681658,2.3906247737-2.4997552752,3.5686032894-2.7403470195,6.2215006123,5.6822053686,7.0385432408,8.3378395804,11.1879480237,4.3894216554,5.5840441558,.8933275887,13.0628941767-5.8792690624,13.8857145867-.4700224492,.0757092812-.7749242043-.5361813962-.4405041118-.8661430791h0Z'%20style='fill:%20%23fff;'/%3e%3cpath%20d='M113.7231445312,74.3781738281c4.0590246095-4.3648976284,4.3772699812-8.2065642472-1.2489412214-11.028303184-3.6184795357-1.8060458875-6.9871649718-5.5980775699-6.5959767026-10.074277656,.4019105704-4.2767827711,3.9999201628-7.1753839387,7.8112502901-7.6859836574,.3283453684-.0461522995,.6318121652,.1826074662,.6779547434,.5109766068,.0269175577,.1913521965-.0391379295,.3702134309-.1625984768,.5014650512-1.0720206639,1.2231443238-1.9807120701,2.3906247926-2.4999991795,3.5686033082-2.7398498815,6.2214960836,5.6821662961,7.0384451345,8.3378396749,11.1879479522,4.3897169706,5.5838511286,.8934781411,13.0629783335-5.879024977,13.8857146381-.4701576908,.0758832351-.7749710703-.5365126447-.440504151-.8661430591h0Z'%20style='fill:%20%23fff;'/%3e%3cpath%20d='M77.8288574219,74.3781738281c4.059276065-4.3648488526,4.3772566513-8.206473909-1.2489412325-11.0283032956-3.618479524-1.8060457759-6.9871649612-5.5980774583-6.5959766916-10.0742775444,.4019105696-4.2767827711,3.9999201634-7.1753839387,7.8112502901-7.6859836574,.3283453684-.0461522995,.6318121653,.1826074662,.6779547434,.5109766068,.0269175581,.1913521965-.0391379298,.3702134309-.1625984768,.5014650512-1.0720206638,1.2231443238-1.9804679295,2.3906247926-2.4999991795,3.5686033082-2.7399440278,6.2215253333,5.682384196,7.0384370977,8.3378398134,11.1879478579,4.3897168355,5.5838512246,.8934779978,13.0629784293-5.8790251154,13.8857147325-.4701576865,.0758832351-.7749710734-.5365126447-.440504151-.8661430591h0Z'%20style='fill:%20%23fff;'/%3e%3c/svg%3e)
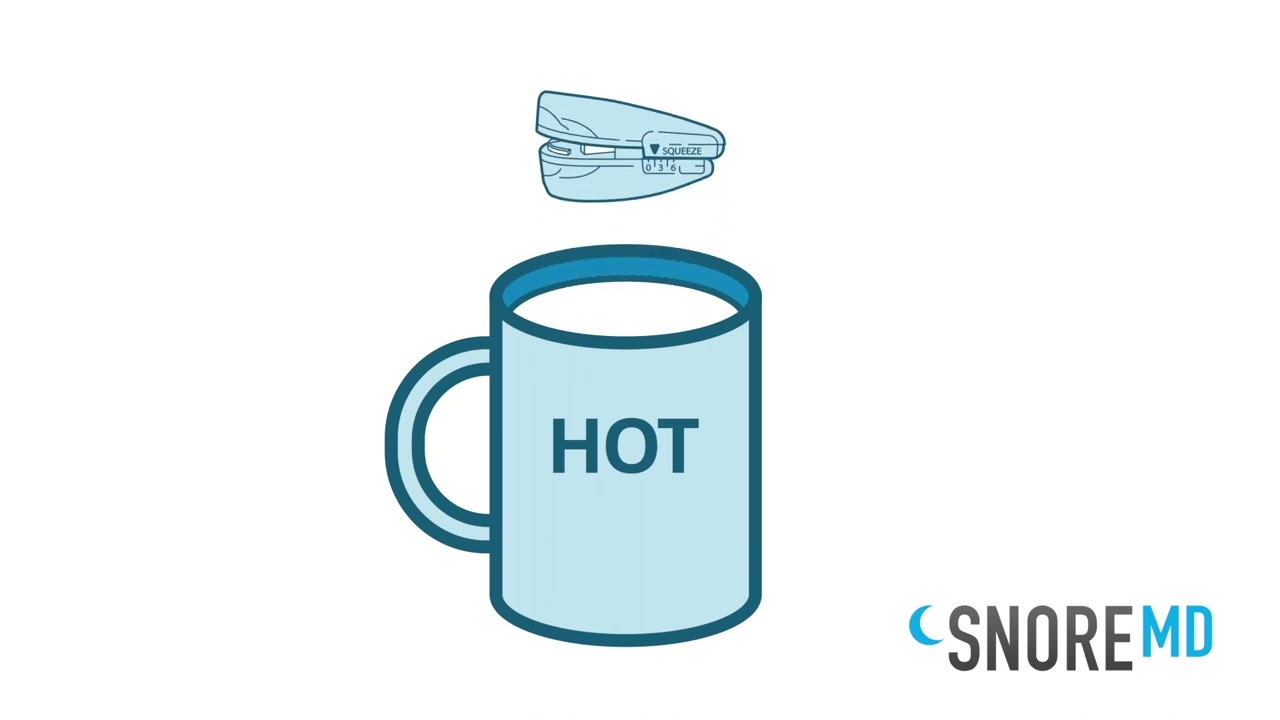
Soften the material
Boil water and submerge the device for 90 seconds using tongs or a spatula

Create your impression
Let it cool briefly, center it on your teeth, and bite down firmly for 30 seconds
%20--%3e%3csvg%20version='1.1'%20id='Layer_1'%20xmlns='http://www.w3.org/2000/svg'%20xmlns:xlink='http://www.w3.org/1999/xlink'%20x='0px'%20y='0px'%20viewBox='0%200%20192%20192'%20style='enable-background:new%200%200%20192%20192;'%20xml:space='preserve'%3e%3cstyle%20type='text/css'%3e%20.st0{fill:url(%23SVGID_1_);}%20.st1{fill:none;stroke:%23FFFFFF;stroke-width:4;stroke-linecap:round;stroke-linejoin:round;}%20%3c/style%3e%3clinearGradient%20id='SVGID_1_'%20gradientUnits='userSpaceOnUse'%20x1='0'%20y1='96'%20x2='192'%20y2='96'%20gradientTransform='matrix(1%200%200%20-1%200%20192)'%3e%3cstop%20offset='0'%20style='stop-color:%2322A5DB'/%3e%3cstop%20offset='0.5'%20style='stop-color:%2352C8F2'/%3e%3cstop%20offset='1'%20style='stop-color:%2322A5DB'/%3e%3c/linearGradient%3e%3ccircle%20class='st0'%20cx='96'%20cy='96'%20r='96'/%3e%3cg%3e%3cpath%20class='st1'%20d='M96,45.4c-34.1,0-61.9,38.1-64,86.3c-0.1,3.1,2.3,5.7,5.4,5.7h22.1c3,0,5.4-2.4,5.4-5.3%20c0.7-35.1,8.1-62.7,31-62.7s30.3,27.6,31,62.7c0.1,3,2.5,5.3,5.4,5.3h22.1c3.1,0,5.6-2.6,5.4-5.7C157.9,83.6,130.1,45.4,96,45.4%20L96,45.4z'/%3e%3cg%3e%3cpath%20class='st1'%20d='M106.2,57.9l-0.1,0.5c-0.4,1.4,0.3,2.9,1.7,3.6c1.4,0.7,2.8,1.5,4.1,2.4c1.4,1,3.2,0.6,4.2-0.7l0.6-0.9%20c1-1.5,0.6-3.6-1-4.4c-1.8-0.9-3.7-1.8-5.6-2.4C108.5,55.3,106.7,56.3,106.2,57.9z'/%3e%3cpath%20class='st1'%20d='M136.9,81.7l-7.4,2.2c-1.6,0.5-2.6,2.2-2,3.9c0.7,2.2,1.4,4.4,2,6.8c0.4,1.6,2,2.5,3.6,2.2l9-2.1%20c1.9-0.4,2.8-2.5,2-4.2c-1.2-2.5-2.4-4.9-3.8-7.3C139.6,81.9,138.2,81.3,136.9,81.7L136.9,81.7z'/%3e%3cpath%20class='st1'%20d='M143.3,94.8l-10.1,2.4c-1.6,0.4-2.6,1.9-2.3,3.5c0.7,3.5,1.3,7.2,1.8,11.1c0.2,1.6,1.7,2.8,3.3,2.6l12.1-1.4%20c1.8-0.2,3-1.9,2.6-3.7c-1.1-4.4-2.4-8.6-3.9-12.6C146.2,95.2,144.7,94.4,143.3,94.8z'/%3e%3cpath%20class='st1'%20d='M148.7,113.4l-12.8,1.5c-1.6,0.2-2.8,1.6-2.6,3.3c0.3,3.3,0.5,6.7,0.6,10.1c0.1,1.6,1.4,2.9,3,2.9h13.6%20c1.8,0,3.1-1.5,3-3.2c-0.3-4.1-0.8-8.1-1.5-12C151.8,114.3,150.3,113.2,148.7,113.4L148.7,113.4z'/%3e%3cpath%20class='st1'%20d='M116.4,68.3c1.1,1.1,2.1,2.3,3.1,3.6c1,1.3,2.8,1.7,4.2,0.7l2.7-1.9c1.6-1.1,1.7-3.4,0.3-4.7%20c-1.7-1.5-3.4-2.9-5.1-4.1c-1.4-1-3.2-0.6-4.2,0.7l-1.3,1.8C115.3,65.7,115.4,67.3,116.4,68.3z'/%3e%3cpath%20class='st1'%20d='M98.9,59.6c1.1,0.1,2.2,0.3,3.3,0.5c1.5,0.3,3.1-0.6,3.5-2.1l0-0.1c0.5-1.7-0.6-3.5-2.3-3.8%20c-1.3-0.2-2.6-0.4-3.9-0.5c-1.7-0.2-3.2,1.3-3.2,3v0C96.3,58.1,97.4,59.4,98.9,59.6z'/%3e%3cpath%20class='st1'%20d='M127.6,70.5l-3.9,2.7c-1.3,0.9-1.6,2.6-0.9,3.9c0.8,1.5,1.6,3.1,2.3,4.7c0.6,1.4,2.1,2.1,3.6,1.7l6.1-1.8%20c2-0.6,2.8-2.9,1.6-4.6c-1.6-2.2-3.2-4.2-4.9-6.2C130.6,69.8,128.8,69.7,127.6,70.5z'/%3e%3c/g%3e%3cg%3e%3cpath%20class='st1'%20d='M85.8,57.9l0.1,0.5c0.4,1.4-0.3,2.9-1.7,3.6c-1.4,0.7-2.8,1.5-4.1,2.4c-1.4,1-3.2,0.6-4.2-0.7l-0.6-0.9%20c-1-1.5-0.6-3.6,1-4.4c1.8-0.9,3.7-1.8,5.6-2.4C83.5,55.3,85.3,56.3,85.8,57.9z'/%3e%3cpath%20class='st1'%20d='M55.1,81.7l7.4,2.2c1.6,0.5,2.6,2.2,2,3.9c-0.7,2.2-1.4,4.4-2,6.8c-0.4,1.6-2,2.5-3.6,2.2l-9-2.1%20c-1.9-0.4-2.8-2.5-2-4.2c1.2-2.5,2.4-4.9,3.8-7.3C52.4,81.9,53.8,81.3,55.1,81.7z'/%3e%3cpath%20class='st1'%20d='M48.7,94.8l10.1,2.4c1.6,0.4,2.6,1.9,2.3,3.5c-0.7,3.5-1.3,7.2-1.8,11.1c-0.2,1.6-1.7,2.8-3.3,2.6L43.9,113%20c-1.8-0.2-3-1.9-2.6-3.7c1.1-4.4,2.4-8.6,3.9-12.6C45.8,95.2,47.3,94.4,48.7,94.8z'/%3e%3cpath%20class='st1'%20d='M43.3,113.4l12.8,1.5c1.6,0.2,2.8,1.6,2.6,3.3c-0.3,3.3-0.5,6.7-0.6,10.1c-0.1,1.6-1.4,2.9-3,2.9H41.5%20c-1.8,0-3.1-1.5-3-3.2c0.3-4.1,0.8-8.1,1.5-12C40.2,114.3,41.7,113.2,43.3,113.4z'/%3e%3cpath%20class='st1'%20d='M75.6,68.3c-1.1,1.1-2.1,2.3-3.1,3.6c-1,1.3-2.8,1.7-4.2,0.7l-2.7-1.9c-1.6-1.1-1.7-3.4-0.3-4.7%20c1.7-1.5,3.4-2.9,5.1-4.1c1.4-1,3.2-0.6,4.2,0.7l1.3,1.8C76.7,65.7,76.6,67.3,75.6,68.3z'/%3e%3cpath%20class='st1'%20d='M93.1,59.6c-1.1,0.1-2.2,0.3-3.3,0.5c-1.5,0.3-3.1-0.6-3.5-2.1l0-0.1c-0.5-1.7,0.6-3.5,2.3-3.8%20c1.3-0.2,2.6-0.4,3.9-0.5c1.7-0.2,3.2,1.3,3.2,3v0C95.7,58.1,94.6,59.4,93.1,59.6z'/%3e%3cpath%20class='st1'%20d='M64.4,70.5l3.9,2.7c1.3,0.9,1.6,2.6,0.9,3.9c-0.8,1.5-1.6,3.1-2.3,4.7c-0.6,1.4-2.1,2.1-3.6,1.7l-6.1-1.8%20c-2-0.6-2.8-2.9-1.6-4.6c1.6-2.2,3.2-4.2,4.9-6.2C61.4,69.8,63.2,69.7,64.4,70.5z'/%3e%3c/g%3e%3c/g%3e%3c/svg%3e)
Set the mold
Rinse in cool water to lock in the impression
The process to mold it to your specifications were spot on. This product aligns your top and bottom jaw bone so you have essentially no overbite and it worked perfectly.
In addition to not snoring I noticed I slept more comfortably all night and felt better the next morning. OMG what a difference!! Good Luck!! And sweet dreams!!
Find Your Ideal Jaw Setting
SnoreMD adjusts in 1mm increments so you can find the minimum advancement needed for snoring relief without discomfort.
%20--%3e%3csvg%20version='1.1'%20id='Layer_1'%20xmlns='http://www.w3.org/2000/svg'%20xmlns:xlink='http://www.w3.org/1999/xlink'%20x='0px'%20y='0px'%20viewBox='0%200%20439.7%20517.8'%20style='enable-background:new%200%200%20439.7%20517.8;'%20xml:space='preserve'%3e%3cstyle%20type='text/css'%3e%20.st0{fill:none;stroke:%23CBD5E1;stroke-width:3;stroke-linecap:round;stroke-dasharray:10,10;}%20.st1{fill:none;stroke:%23CBD5E1;stroke-width:3;stroke-linecap:round;stroke-linejoin:round;}%20%3c/style%3e%3cpath%20class='st0'%20d='M1.5,1.5v55C1.5,71.7,12.7,84,26.6,84l0,0h378.3c13.9,0,25.1,12.3,25.1,27.5l0,0v36.7'/%3e%3cpath%20class='st1'%20d='M421.8,137.1l8.2,12.4l8.2-12.4'/%3e%3cpath%20class='st0'%20d='M430,446.5v20.1c0,11.1-11.5,20.1-25.7,20.1H236.8c-14.2,0-25.7,9-25.7,20.1v6.7'/%3e%3cpath%20class='st1'%20d='M204.9,506.3l6.2,10.1l6.2-10.1'/%3e%3cpath%20class='st0'%20d='M226.4,368.6H31.4c-16.5,0-29.9-9-29.9-20.1c0-6.7,0-13.4,0-20.1c0-13.5,0-27.1,0-40.6c0-8.7,0-17.5,0-26.2%20c0-18.2,0-36.5,0-54.7'/%3e%3cpath%20class='st1'%20d='M214,375.3l12.4-6.7l-12.4-6.7'/%3e%3c/svg%3e)

How to adjust
Push both sides of the lower tray forward or backward to your desired millimeter setting. Make sure both sides match before wearing
Small adjustments make a big difference. Give each setting time to work before moving to the next.
%20--%3e%3csvg%20version='1.1'%20id='Layer_1'%20xmlns='http://www.w3.org/2000/svg'%20xmlns:xlink='http://www.w3.org/1999/xlink'%20x='0px'%20y='0px'%20viewBox='0%200%2023%2069'%20style='enable-background:new%200%200%2023%2069;'%20xml:space='preserve'%3e%3cstyle%20type='text/css'%3e%20.st0{fill:none;stroke:%23CBD5E1;stroke-width:3;stroke-linecap:round;stroke-dasharray:8,8;}%20.st1{fill:none;stroke:%23CBD5E1;stroke-width:3;stroke-linecap:round;stroke-linejoin:round;}%20%3c/style%3e%3cpath%20class='st0'%20d='M11.5,1.5v66'/%3e%3cpath%20class='st1'%20d='M1.5,52.5l10,15l10-15'/%3e%3c/svg%3e)
%20--%3e%3csvg%20version='1.1'%20id='Layer_1'%20xmlns='http://www.w3.org/2000/svg'%20xmlns:xlink='http://www.w3.org/1999/xlink'%20x='0px'%20y='0px'%20viewBox='0%200%20128.8%20128.8'%20style='enable-background:new%200%200%20128.8%20128.8;'%20xml:space='preserve'%3e%3cstyle%20type='text/css'%3e%20.st0{fill:none;stroke:%23000000;stroke-width:5.6693;stroke-linecap:round;stroke-linejoin:round;}%20%3c/style%3e%3cg%3e%3cpath%20d='M84,5.7c0.2,0,0.6,0.1,0.9,0.4l37.9,37.9c0.5,0.5,0.5,1.3,0,1.8l-4.3,4.3c-0.6-0.8-1.2-1.5-1.9-2.2%20c-3.1-3.1-7.2-4.8-11.6-4.8c-4.7,0-9.1,1.8-12.4,5.2c-6.8,6.8-6.9,17.5-0.4,24.1c0.7,0.7,1.4,1.3,2.2,1.9l-5.2,5.2L74.6,64.6%20c-1.1-1.1-2.5-1.7-4-1.7c-0.9,0-1.7,0.2-2.5,0.6c-2.2,1.1-3.4,3.4-3.1,5.8c0.2,1.7-0.3,3.3-1.4,4.4c-0.9,0.9-2.2,1.4-3.6,1.4%20c-1.6,0-3.2-0.7-4.4-1.9c-2.3-2.3-2.5-5.9-0.4-8c0.9-0.9,2.2-1.4,3.6-1.4c0.3,0,0.5,0,0.8,0.1c0.3,0,0.5,0,0.7,0%20c2.1,0,4.1-1.2,5.1-3.2c1.1-2.2,0.6-4.8-1.1-6.5L49.6,39.6l5.2-5.2c0.6,0.8,1.2,1.5,1.9,2.2c3.1,3.1,7.2,4.8,11.6,4.8%20c4.7,0,9.1-1.8,12.4-5.2c6.8-6.8,6.9-17.5,0.4-24.1c-0.7-0.7-1.4-1.3-2.2-1.9L83.2,6C83.5,5.7,83.8,5.7,84,5.7%20M84,0%20c-1.8,0-3.5,0.7-4.9,2L68,13.2c0.5-0.1,1-0.1,1.5-0.1c2.8,0,5.5,1,7.6,3.1c4.3,4.3,4.1,11.5-0.4,16c-2.4,2.4-5.4,3.5-8.4,3.5%20c-2.8,0-5.5-1-7.6-3.1c-2.5-2.5-3.4-5.8-3-9.1L41.6,39.6l18.7,18.7c-0.5-0.1-1-0.1-1.5-0.1c-2.8,0-5.5,1-7.6,3.1%20c-4.3,4.3-4.1,11.5,0.4,16c2.4,2.4,5.4,3.5,8.4,3.5c2.8,0,5.5-1,7.6-3.1c2.5-2.5,3.4-5.8,3-9.1l18.7,18.7l16.1-16.1%20c-0.5,0.1-1,0.1-1.5,0.1c-2.8,0-5.5-1-7.6-3.1c-4.3-4.3-4.1-11.5,0.4-16c2.4-2.4,5.4-3.5,8.4-3.5c2.8,0,5.5,1,7.6,3.1%20c2.5,2.5,3.4,5.8,3,9.1l11.2-11.2c2.7-2.7,2.7-7.1,0-9.8L88.9,2C87.6,0.7,85.8,0,84,0L84,0z'/%3e%3c/g%3e%3cpath%20class='st0'%20d='M41.6,39.6L25.9,55.2c0.4-3.3-0.6-6.7-3-9.1c-4.3-4.3-11.5-4.1-16,0.4c-4.5,4.5-4.7,11.7-0.4,16%20c2.5,2.5,5.8,3.4,9.1,3L4.9,76.3c-2.7,2.7-2.7,7.1,0,9.8L42.7,124c2.7,2.7,7.1,2.7,9.8,0l36.7-36.7'/%3e%3c/svg%3e)
Finding what works for you
- Start at initial setting for the first few nights
- If snoring continues, advance 1mm and wear for another 3-5 nights
- Most find their ideal setting between 3-5mm
- If you feel discomfort, reduce the setting
Questions about Fitting?
Our support team is here to help if you run into any issues.


